
SEFC Trading System
SEFC Trading System review with BBand Stop Alert, SEFC indicators, filters and momentum confirmation. Full trading logic explained.
Description
SEFC Trading System is a multi-layer confirmation strategy built from several technical components working together. The system includes BBand Stop Alert, SEFC05, SEFC10, SEFC 084 (Bull & Bear), Filter 1, Filter 2, FerruFx Multi Info THV, as well as auxiliary tools such as GP Clock and Mint Signal. On some chart templates, multiple indicators are stacked together, combining trend structure, momentum confirmation, and signal timing into one environment.
After testing the system mainly on M15 and H1, I can say it is clearly designed as a confirmation-based framework rather than a fast trigger system. It relies heavily on alignment between several indicators before allowing an entry.
BBand Stop Alert
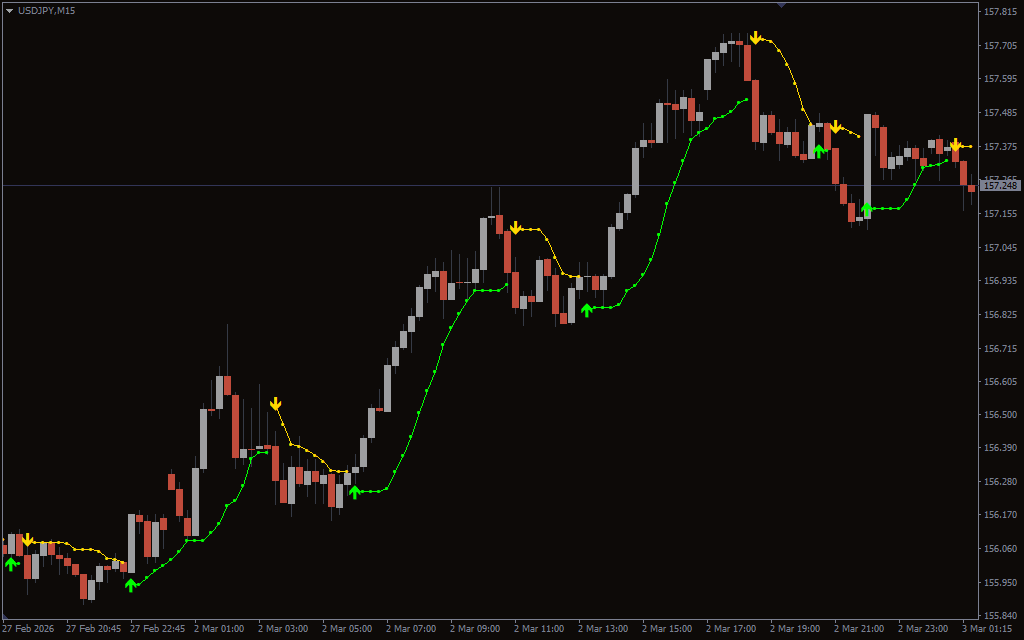
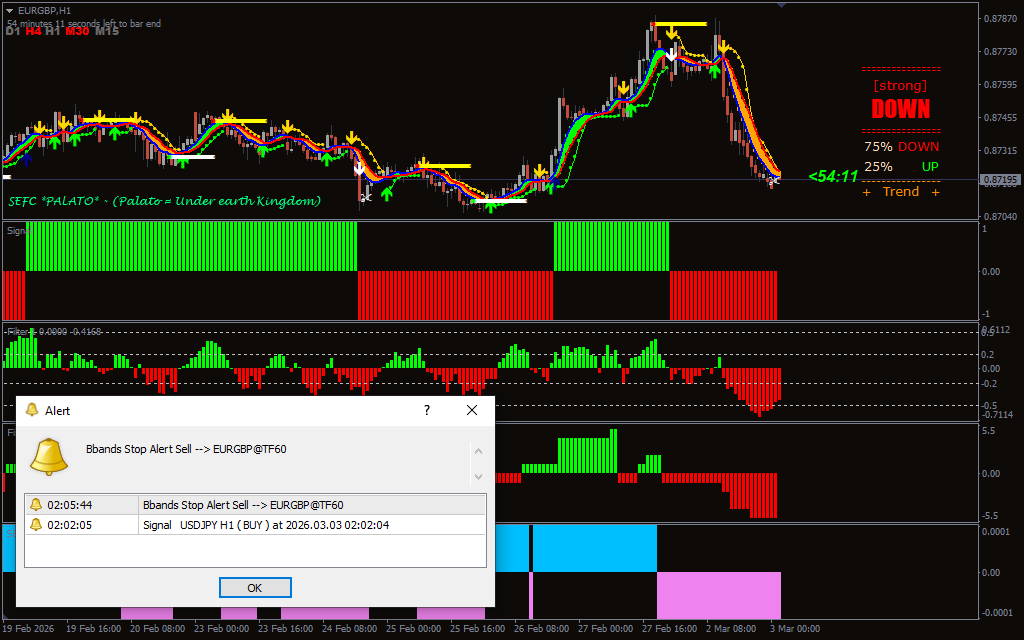
BBand Stop Alert acts as the primary trigger indicator. It plots arrows and trailing stop-style lines directly on the chart. A green arrow typically signals potential long continuation, while a yellow arrow signals potential short continuation.
This indicator functions best when volatility expands and price respects dynamic bands. However, during sideways compression, it can generate signals with limited follow-through. It should not be used in isolation — its strength lies in confirmation from the other SEFC components.
SEFC Indicators
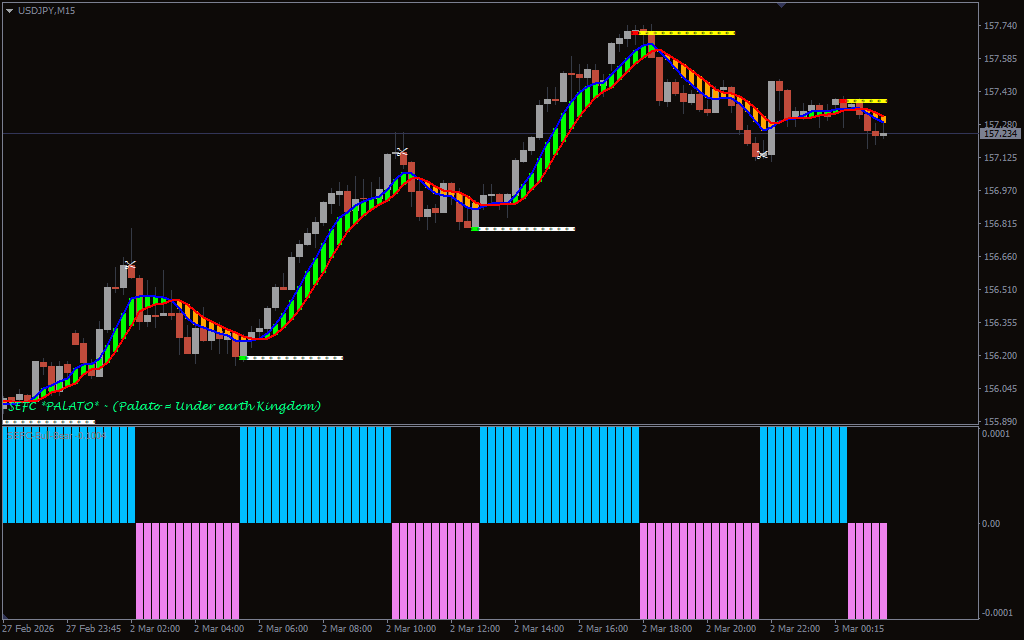
SEFC05 measures internal momentum through the relationship between two moving components. When the blue line crosses above the red line, bullish momentum is building. When the red line dominates above the blue line, bearish pressure increases.
This indicator works as a momentum filter. It helps avoid entering trades when the arrow appears but momentum does not support the direction. From practical testing, ignoring this filter significantly reduces trade quality.
SEFC10 Support and Resistance
SEFC10 forms horizontal levels on the chart that behave like dynamic support and resistance. A white horizontal line typically marks a support zone, while a yellow line indicates resistance.
These levels help define structure. Long trades are stronger when price reacts from SEFC10 support. Short trades gain more reliability near SEFC10 resistance. Without structural confirmation, entries become less consistent.
SEFC 084 (Bull & Bear)
SEFC 084 shows histogram-style bars indicating dominant trend pressure. Green bars indicate bullish control; red bars represent bearish dominance.
This component acts as a trend strength confirmation. Consistency with SEFC05 and BBand Stop signals increases trade probability. When the histogram bars fluctuate rapidly, it usually signals unstable conditions.
Filter 1 and Filter 2
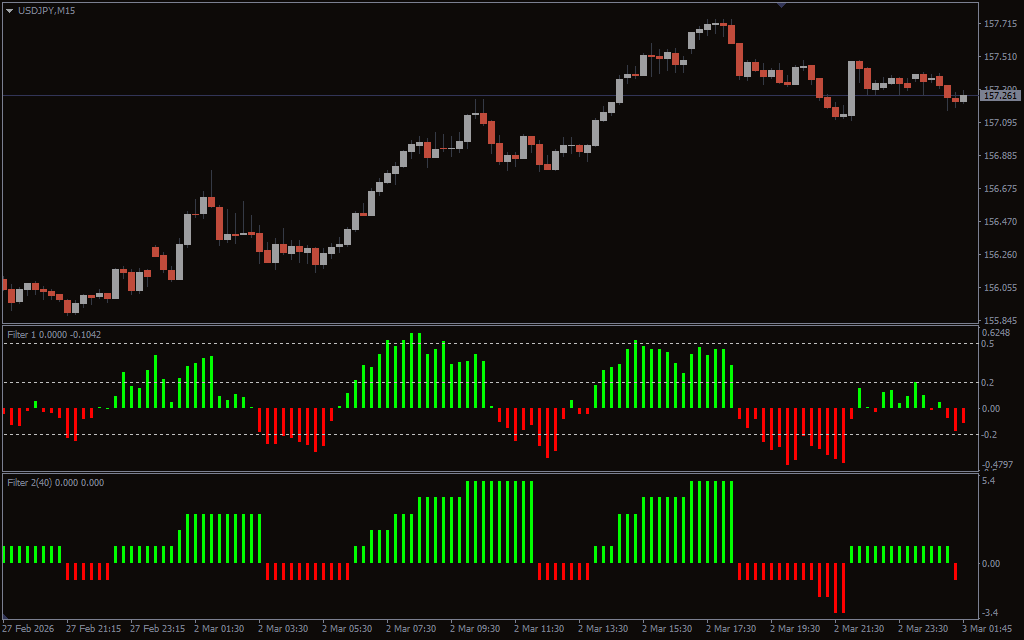
Filter 1 and Filter 2 add additional confirmation layers via histogram bars. Green bars show bullish bias, red bars bearish bias. These filters reduce noise by requiring broader agreement before entry. They reduce the frequency of trade, but they eliminate many weak signals. If you remove either filter you increase activity but you decrease consistency.
FerruFx Multi Info THV Indicator
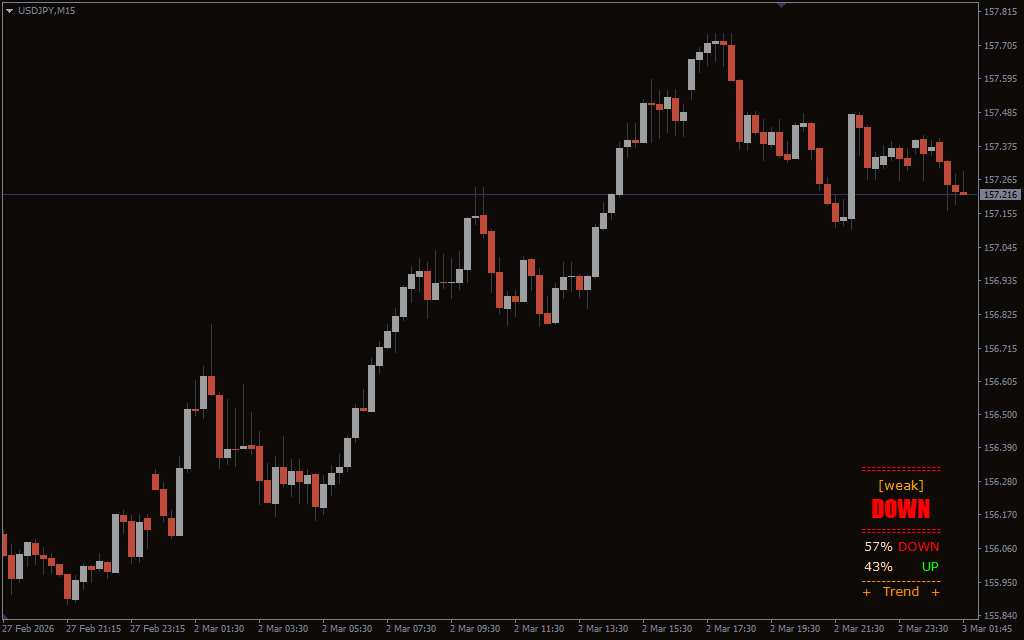
FerruFx Multi Info THV is a market condition dashboard which shows directional strength and trend information across timeframes. It does not produce direct entry signals, but does offer valuable context on current momentum and bias. If the indicator shows a clear direction (e.g., DOWN or UP), it can help filter out trades that conflict with the broader trend. More on this indicator and its common use cases is here.
GP Clock and Mint Signal Indicators
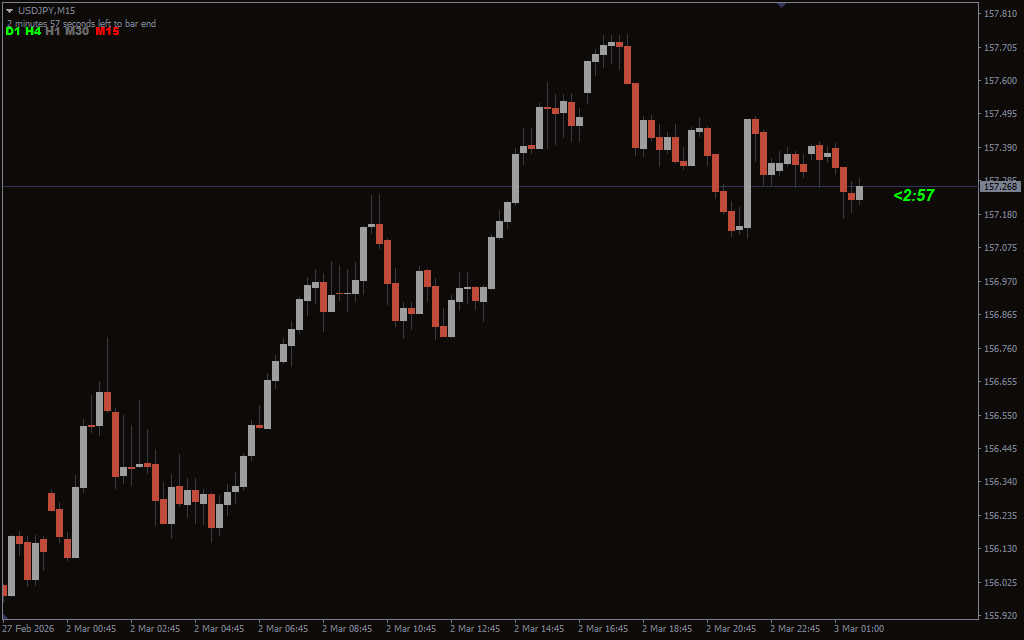
GP Clock is a timing tool that visually represents market session and time structure and enables traders to avoid low-liquidity hours. Mint Signal gives directional hints, but in my testing it works better as secondary confirmation rather than a primary trigger.
How SEFC Trading System Works Together
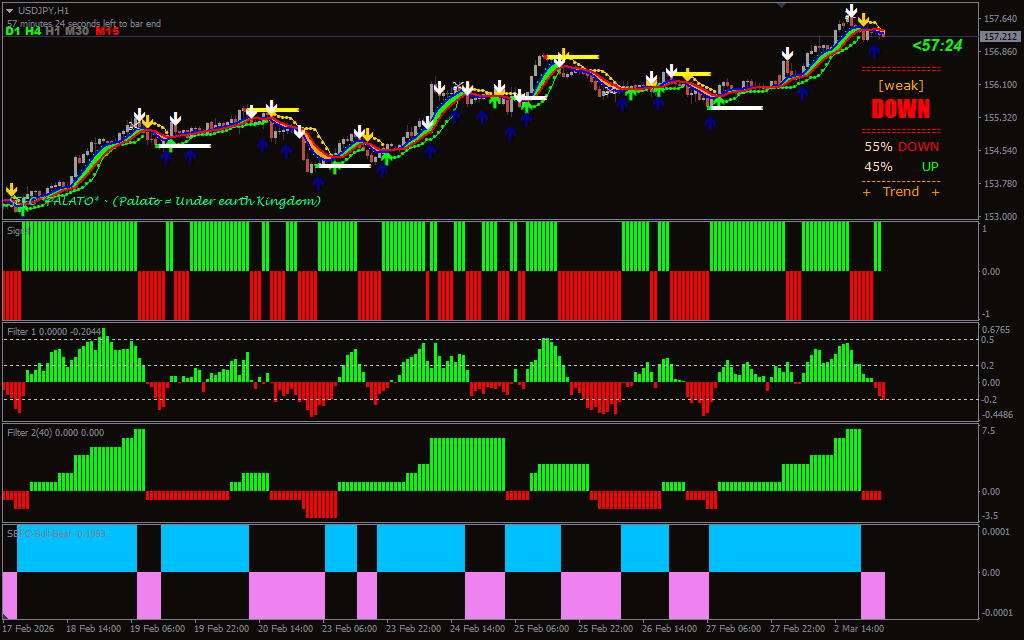
SEFC Trading System is based on multi-layer confirmation. A trade should not be triggered by a single indicator alone. The system requires alignment between structural levels, momentum filters, trend histograms, and BBand Stop signals.
The general workflow begins with evaluating overall trend pressure using SEFC 084 and Filters. Long setups are considered only if bullish dominance is visible. If bearish pressure dominates, only short setups are considered.
Next, structural confirmation from SEFC10 is observed. Trades taken near identified support or resistance zones tend to perform better than entries taken mid-range.
Finally, BBand Stop Alert provides the timing trigger. Entry becomes valid only when the arrow aligns with momentum (SEFC05) and trend confirmation (SEFC 084 + Filters).
From practical testing, the most important element is not the arrow itself, but the agreement between structure and momentum. When SEFC084 histogram, both Filters, and SEFC05 are aligned before the BBand signal appears, trade quality improves significantly. If alignment happens after the arrow, the move is often already extended.
Another critical observation is timing. The system performs noticeably better during active market sessions. During Asian low-volatility hours or pre-news compression phases, even fully aligned signals tend to produce weaker follow-through. Ignoring session context reduces overall consistency.
SEFC Trading Rules
- Trade only in the direction confirmed by SEFC084 and both Filters.
- Confirm momentum alignment using SEFC05 before entering.
- Prefer entries near SEFC10 support or resistance levels.
- Use BBand Stop Alert arrow as the final trigger.
- Avoid trading during major news releases or low-volatility sessions.
- Place stop loss beyond recent swing high/low.
- Target at least 1:1.5 risk-to-reward ratio or exit on opposite BBand Stop signal.
Performance Considerations
The system is heavy in confirmations, which naturally reduces trade frequency. In trending markets, alignment between all components can produce structured moves. However, in choppy conditions, filters may conflict, leading to either no trades or delayed entries.
Because of the number of components, discipline is critical. Entering on partial confirmation significantly reduces effectiveness.
Conclusion
SEFC Trading System is a layered confirmation framework combining volatility signals, structural levels, and momentum filters. It is not a simple arrow-based strategy; it demands alignment between multiple tools.
When market conditions are directional and volatility is present, the system can produce structured setups. In flat or low-volume environments, performance weakens and trade frequency drops.
In my experience, the system’s real strength lies in its filtering capability rather than its signal frequency. It forces the trader to wait for agreement across several independent calculations, which naturally reduces impulsive entries. However, this also means that late entries are common if discipline is not maintained.
Remember adding more confirmations isn’t always a good profit. Over-filtering can slow, or even halt, entry and reduce reward to risk. SEFC traders need to think about whether alignment happens early in the move or after momentum has already expanded.

1 2 3 4 5